Back to Blog / July 14, 2026 · Updated July 22, 2026
MOMENT hazard guide
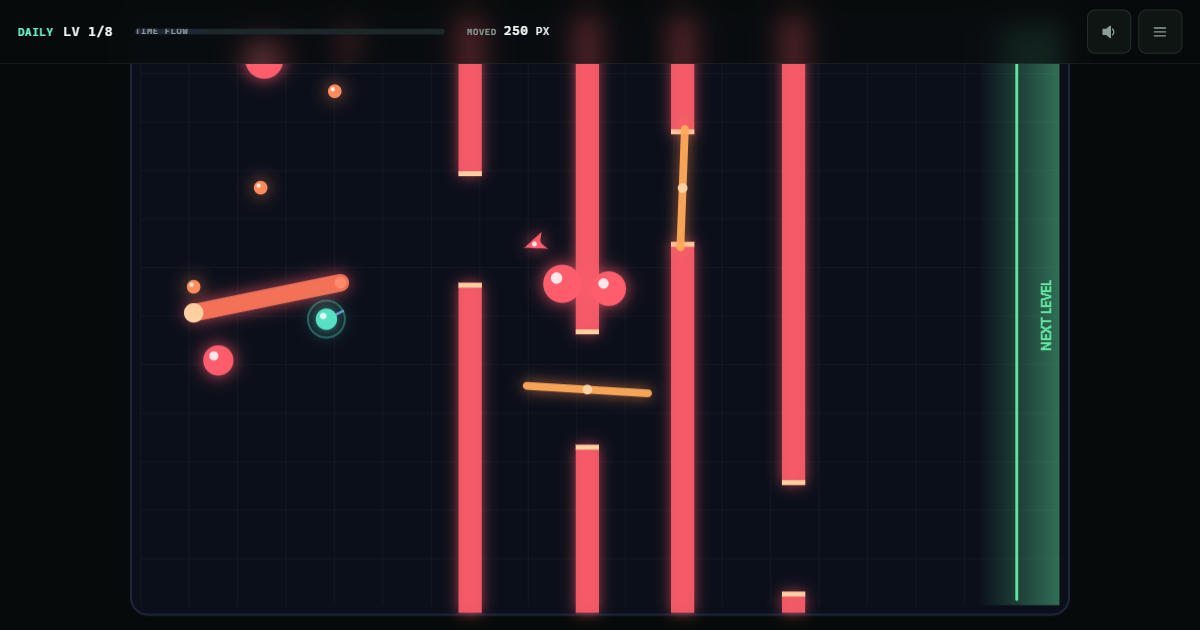
Every threat is frozen until you move. That gives you time to read its shape, direction, and safe route before spending a single pixel.
First, understand what movement spends
MOMENT does not advance on a normal clock. The world receives movement only when the orb moves, and a fast long motion advances danger more than the same route taken in careful pieces. This is why a straight dash can fail even when the line looked open while frozen. Large movement makes balls travel farther, beams rotate more, gaps drift, seekers close in, and turret charge rings fill.
The score follows a different priority. Progress comes first. Among runs that reach the same point, the cleaner route with less total movement wins. Do not protect a low pixel count by refusing to advance. Use stillness to plan, then commit to the shortest safe route you can see.
Pipes and drifting gaps
Pipes are the vertical red walls that form the basic route through most levels. Each wall has one opening. Neighboring openings are placed in different vertical bands, so a single horizontal dash is rarely safe. Trace a route from the first gap to the second before touching the orb.
Some gaps drift inside their own half of the arena. A gap never crosses into the opposite band, so the broad shape of the route remains readable. If the opening is moving away from your planned line, use tiny movements to advance it gradually. Stop when the center aligns with the next leg of your route, then pass through with a controlled motion.
Bouncing balls
Round red hazards travel in straight lines and bounce from the arena boundaries. Their short fading trails reveal direction even when the world is still. Extend that trail mentally to predict the next segment. Near a wall, remember that the next movement may cause an immediate bounce and reverse the line.
Do not chase the current position of a ball. Plan around where it will be after your own movement advances the world. When several balls form a swarm, look for a quiet region first, then connect that region to the next pipe opening.
Rotating beams and orbiting hazards
A rotating beam has a fixed center and a glowing arm. The entire arm is dangerous, not only the bright tip. Compare the arm's current angle with your route and decide whether your movement will rotate it into or away from the lane. Passing close to the center usually leaves less room for error because many future angles still cover that area.
Orbiting hazards follow the faint circular path drawn around their center. The circle is useful information: it shows every position the red orb can occupy. Cross the ring where the moving orb has just passed, or wait in place and plan a route that avoids the ring entirely.
Blades inside openings
Blades rotate around the center of a pipe gap. The opening may look generous, but the blade turns that space into a timing problem controlled by your own motion. Move in small increments until the blade is close to parallel with your intended route. Then pass the wall without adding unnecessary sideways correction.
Because the blade advances only when you do, waiting in real time changes nothing. The useful action is a small setup movement in safe space. That motion rotates the blade while keeping the orb away from it.
Seekers
Seekers are pointed red hazards that aim toward the orb. Every unit of world movement brings them closer to your current position. A panicked dash gives a seeker more travel and can turn a safe lead into a collision. Short, deliberate course changes work better because they limit how much the seeker can correct.
Use pipes as route constraints rather than imagined shields. Seekers do not need to follow your exact path through a gap. Your goal is to keep their approach line away from the point where you must cross the next wall.
Turrets and shots
Turrets sit near the top or bottom edge and aim a barrel at the orb. The ring around a turret is its charge indicator. Your movement fills that ring. When it completes, the turret fires toward your position at that moment.
Before a shot, choose a safe place for the turret to target. Let a small movement complete the charge, then change direction after the shot is committed. The projectile continues along its fired line, so a measured sidestep is usually safer than a long escape motion that also accelerates every other threat.
Pulse lasers
A pulse laser is a full-height magenta line held between two emitters. It cycles through three readable states: a faint dashed line while dormant, a brightening dashed warning, and a solid beam that kills on contact. The cycle advances only with your movement, so the laser never surprises a still player.
The dormant window is long enough to cross calmly, and that is the whole technique: start your crossing early in the quiet phase and take it in one controlled motion. The mistake to avoid is starting a crossing during the warning flicker. If the beam is already bright, stop in safe space and let it finish its active phase with tiny setup movements elsewhere on your route.
Proximity mines
A mine is a spiked body inside a faint dotted circle. The circle is its sensor. Outside it the mine is completely inert, which makes it different from every other hazard on this page: it punishes route choice, not timing. Touching the body itself is always fatal.
Enter the sensor and the mine arms: the ring brightens to show the blast radius and a gauge around the core burns down as you move. The fuse budget is deliberately larger than the escape distance, so the answer is never panic. Turn toward the shortest line out of the blast circle and walk it. Freezing stops the fuse entirely, but it does not disarm the mine, so use the pause to pick your exit, not to wait out a timer that cannot expire on its own.
Dashers
A dasher is a large dart that rests, aims, and lunges. The instant it begins aiming it locks its heading, so the dashed line you see is the exact path the charge will take. That line brightens as the launch approaches, then the dasher runs a fixed distance straight along it.
The early lock is the weakness. The path is committed before the charge starts and never bends afterwards, and because the dash advances only with your movement you watch it approach in slow motion. Stepping off the drawn line while the dasher is still aiming is enough at any range, including point blank. The worst response is a long escape dash: it hands the dasher its full travel distance at once and drags every other hazard forward with it.
Build a route in three passes
- Read the walls. Locate every pipe opening and identify the main vertical changes.
- Read active threats. Use trails, orbit rings, beam angles, seeker headings, turret charge, laser cycles, mine sensors, and dash telegraphs to predict what your movement will change.
- Remove corrections. Pick a small number of clean waypoints. Extra wiggles spend distance and give every hazard more time.
Use One Life as the open-ended main test of these reads: every new level asks you to recognize the danger without a safety net. Use Daily as the shared test. Its eight-stage course has no warm-up, opens with combinations you would normally meet deep into a run, and ends with five tight gates under blades, beams, swarms, seekers, orbiting threats, turret fire, a pulse laser, armed mines, and a dasher. The layout is fixed for the date, so every retry rewards better pattern knowledge rather than a different random arrangement.
When several threat types overlap in Daily, solve them in layers. Read the gate path first, identify which active hazard will cross that path, then watch the nearest seeker or charged turret. Trying to track every red object equally usually creates the extra movement that kills the run.